27 January 2019

IT IS DONE.


At long last, my 1959 Vogue Knitting dress is finished!! There haven't been many other projects whose completion has brought me so much relief and joy. I honestly thought this one might be the straw that broke the camel's back and derailed me from my century project and languished forever as an unfinished object, but I made it. It was definitely a slog. At the end, though, I have to say that I am pretty pleased with how it all turned out. It was such fun to put it all together today and try it on.

I started this dress back on 25 August 2017. It was finished on 27 January 2019. Let's see if I can remember enough to recap some of my process!

I chose the pattern from the Fall/Winter 1959 issue of Vogue Knitting magazine with the idea of challenging myself to a bigger knit. I located some black wool crepe yarn from Made in America Yarns and ordered 4 cones, figuring that I would need to work with a double strand to get gauge. I experimented with different needle sizes and eventually settled on a size 4, which gave me a suitable gauge: 13 sts is about 2" wide and one full 6-row pattern repeat is about .75" high.


I chose the lacy black dress on the left!
I made the pattern's size 14, casting on 243 sts for each half of the skirt. I opted for 150 rows to get to about 20" in length so that the dress would be about knee-length on me. That's a little shorter than the recommended 27", which I think would have been a bit too long for me. This part of the process was very slow going. The pattern was easy to memorize once established, but, boy did it ever take forever. The skirt is knitted in front and back sections and then seamed together. Once I sewed the first seam, it became really clear that I had A LOT of knitted fabric to deal with. Here's the skirt laid out on our futon!


The top was a little easier to tackle. I again selected the size 14 specifications, but added a few inches to the body length (10" total). I found it very hard to manage increasing and decreasing within the pattern on the back, so I decided not to add any shaping to the lower front. I also opted to lengthen the the armholes slightly. For the sleeves, I went for the largest size so that they would fit into my slightly expanded armholes. Weirdly, there are no conventional shoulders on this top. It's really just a wide, straight neckline that connects directly to the sleeves. It was a little fiddly to put together, but the fit was just right when I finished.

The black lace was super hard to photograph!

I made a few modifications on the finishing. I did two rows of single crochet around the neckline, which was just enough to pull it together and finish the raw edges. The pattern recommends adding single crochet to the sleeves as well, but I really liked the pretty scalloped edge, so I decided not to straighten them out with the crochet border. I did add several rows of crochet to the waist on the skirt to help bring it in closer to my waist size. Since it was still so voluminous, though, I decided not to attach it to the top. I know that means it's technically not a dress, but I do think the two pieces will be more versatile as separates. Going back to the skirt, I thought I'd go with a gathered waist instead of the elastic-and-zipper waist in the pattern. Honestly, after I did a fair bit of crochet on the waistband, I just ran a sturdy cotton tape through the holes in the crochet and made it a drawstring waist. I knew this would all be hidden under the belt. It works just fine.

With photographer Sam's apologies for my cropped head!
I put it all together this morning, along with a wide black belt from my closet. At first, I wasn't sure about the skirt. It just seemed a bit...bulky. And then I realized what it needed. A PETTICOAT. And that was it! That gave the skirt some body and structure and made it so much more fun to wear. And what a great '50s silhouette! I did my best to recreate the model's pose from the original magazine, too. Arthur the Dog joined in on the fun!


I'm really pleased with the way this turned out. And that's a major relief considering just how much knitting went into it. I'm looking forward to wearing this out and about sometime soon. Stay tuned for my foray into '60s knitting next. It's probably not going to be a dress.

Specs
Yarn: Made in America Yarns' Wool Crepe in black
Amounts: about 3 cones total (I held two strands together)
Needles: size 3
Hook: size E
Started: 25 August 2017
Finished: 27 January 2019

21 March 2018

Still knitting the dress...


My last post was in October 2017. In the time between then and now, I've managed to start and get several inches into the 1950s dress I selected for my next knit. And then I hit the pause button and stepped away for some projects that take precedence: gifts and special requested items for some of my favorite (and very knit-worthy) people.

I made my brother a sweater for Christmas, hoping that it would be easier and nicer to wear than the heavy, oversized, and just plain overwhelming one I made for him 10+ years ago. I think I did better this time. The pattern was a simple top-down raglan (from this sweater calculator) in beautifully soft and rustic Peace Fleece worsted in the "Father's Grey" colorway. It went on immediately after being unwrapped, so I think it was a hit.

Since we had a supremely cold and wintry December and early January, I was craving a warm thing to wear in the house all the time, so I picked up the souvenir yarn I bought last spring during our trip to Vancouver and Victoria, BC. The two skeins of Hinterland "Range" were just begging to be worked into a squishy, warm, high-contrast brioche cowl, which is what they became. I used Purl Soho's pattern here. So satisfying.

I also made a soft hat and a pair of socks for my husband, who has been wanting such things for years. The hat, knit in Malabrigo worsted, replaces a slightly scratchy one made with Lopi several years ago. The socks are the first of their kind in his wardrobe. I had resisted making him socks for a long time because...well...because my feet are small and that means socks are a quick and easy project. Plus, I like them in bright colors and unusual patterns But, socks for Sam would be a very different project: no fun colors or crazy patterns and leg and foot would both need to be significantly larger than I usually knit. But, he found a nice pattern (Athos by Caoua Coffee) and I had some suitable yarn, so I jumped it. And they're really nice. The pattern was fun and simple without being boring and they really didn't take much longer than socks for me.

After those fun breaks, I'm back into the 1950s dress. One half of the skirt is now done and I am plugging away on the other half. I try to hit 12 rows per day (that's 243 stitches per row, so nearly 3000 stitches per day) and that's pretty attainable if I don't have anything planned in the evening. Unfortunately, free weekday evenings have been few and far between lately. I'm on row 66 of 150.

I'll get there eventually and then I can start making plans for my '60s knit. The other day, I saw a marvelous vintage cabled mohair sweater with a wide turtleneck at the local flea market. It was soft and light and had a great '60s silhouette. And it looked like such a quick knit, too! Something like that might be just what I need after this dress.

01 October 2017

Mid-century

It's bright and crisp where I am today so, naturally, my thoughts turn to knitting. I made a couple unrelated knit items this summer: a pair of plain everyday socks for myself, which I've already worn a couple of times, and a stuffed octopus for my nephew on his second birthday.

The octopus (or ott-pus, as he says) was great fun. My sister-in-law discovered Joan Rowe's Omniscient Octopus pattern, which is an impressive feat of knitterly engineering. It was engaging to knit and full of great true-to-like details, like a siphon and dozens and dozens of suckers. I used a self-striping sock yarn and enjoyed the overall variegated effect from leg to leg, which are knit separately and fed onto one circular needle, meaning that there is pretty minimal seaming to be done at the end. The head is knit up directly from the top of the legs.


I opted to leave out the chenille stems in the legs to ensure maximum cuddliness for my nephew. When he opened up the gift, he immediately said, "Ott-pus!" I call that a complete success.

After finishing the ottpus, I knew it was time to get back into my century project, so I started to take a look at my 1950s patterns. This is where my personal collection expands exponentially. I have dozens and dozens of '50s booklets from all sorts of sources: my grandmothers and great aunts, yard sales, antique shops, friends...the works. I knew I would have to narrow down my selection somewhat, so I decided to focus on a sub-collection: my newly-acquired Vogue Knitting mags.


These are wonderful publications, chock full of classic patterns that also easily evoke midcentury fashion trends. The sheath dresses, fitted suits, dressy tops, and travel wear, often photographed on location in fabulous places around the world, are all so sleek and elegant.


I paged through my mini-collection a couple of times, finding myself drawn to the dress patterns over and over. I worked up my personal knitting courage and decided to commit to a dress for my 1950s project. After all, I had learned that Consuelo, the woman to whom these books originally belonged was a fearless knitter and had herself knit dresses along with dozens of sweaters for friends and family members. Here she is below, looking so cool as she works on a circular needle all the while keeping a foot on the tiller of her sailboat. The best of multi-tasking! Thanks to Consuelo's daughter Robyn for sharing this fabulous photo with me.


With that, it was decided. A knit dress was in my future. After selecting one with a long full skirt and a wide-necked short sleeve top, I took a look at the instructions, realizing rapidly that the size 1 needles and hundreds of beads required were a bit beyond my desires for this next project (it wasn't obvious in the pattern photo, but the top was both cabled and beaded). So...perhaps that particular dress was not the one in my future.

I eventually settled on a slightly less-involved pattern, with a trimmer skirt and simpler stitch pattern. It's the one on the left in the two-page spread above: a knee-length black dress with an overall lace pattern. I'll be using size 4 needles and two strands held together of a wool/rayon crepe yarn, which I believe is quite similar to the original yarn specified in the pattern. My swatch is a dense springy mesh, to which the lace pattern brings great texture and the fiber blend lends good structure. I hope it will work up into a comfortable, fun garment. Stay tuned. My 1950s dress is underway.

10 July 2017

1940s: Done and Dusted

Here it is! My 1942 "Name, Please" is complete. I'm loving the puffed sleeves (as always), the gold zipper, and the fine gauge of this sweater.
 
You'll notice immediately that I opted for a single set of initials in my version, rather than the all-over pattern in the original. This was simply a matter of taste. I thought I might go for the all-over effect, but once the first set was done, I decided that I liked the look of it. Plus, I used a metallic embroidery thread and I was worried that repeating the letters over and over again would be too much. I think it'll be more wearable for me this way, too. (And also, the one set I did took a long time and was really fiddly and I didn't relish the thought of doing it a dozen more times, so...)
 
On the whole, this was a bit of a long haul, knitting-wise. Those wide bands of moss stitch on size 2 needles are not for the faint of heart and, more than once, I had to grit my teeth and muster up my resolve to keep going. Once I moved on to the stockinette portion, progress became much more evident and the sweater moved more quickly. Shaping and construction were fairly straightforward. I fiddled around with the stitch count for the back, but then ended up making the front to the pattern specifications. I'm happy with the fit.
 
Despite their time-consuming nature, I do love the look of the moss stitch borders and the construction of the front is really great. The partial zipper is a pretty cool feature. I had initially planned to go for a standard all-purpose zipper in a matching brown, but then my husband suggested this gold metallic one and it just seemed perfect. Of course, an original 1940s zipper would have been metal, so it is certainly a more authentic choice as well. I was very careful when installing it to ensure that the knit edges were a safe distance away from the teeth of the zipper. Metal zippers and fine gauge sweaters can be a scary combination without some degree of care and planning. It works smoothly, but I think I'll always feel a little nervous when zipping or unzipping.
 
A closeup of a few details. The dark color of the yarn makes this a very tough sweater to photograph! Please excuse any washed-out areas or blurriness.
The yarn (Jagger Spun Super Lamb 4/14 sock yarn), as I mentioned in this post, is spectacular. I loved working with it, the color is gorgeous, and the finished fabric is fine, even, and soft enough to wear next to the skin. It felt really luxurious to knit and the sweater took a little less than three skeins, so it was quite affordable.
 
 
All in all, my "Name, Please" was a satisfying project. I can absolutely foresee wearing this sweater to work this fall. I'll be back with some 1950s choices soon (my pattern collection really starts to expand when it hits the '50s, so there are lots of options). Dare I attempt a knitted dress?!
 
 
Specs
Yarn: Jagger Spun Super Lamb 4/14 sock yarn in Raw Umber
Amounts: about 2.75 skeins
Needles: size 2
Hardware: 9" sparkly gold metal zipper
Started: 25 February 2017
Finished: 9 July 2017

11 June 2017

Mending

Everything I knit for friends or family members comes with a service contract of sorts. This is an offer (or sometimes a demand) that if any holes or thin spots or seam issues develop, the item should come back to me for a repair. And, boy oh boy, do I ever get great satisfaction from mending an item of knitwear. Part of that comes from knowing that the thing I made has been worn and enjoyed so much that it is starting to show some wear and tear and the rest comes from executing a successful mend and knowing that the object can be worn or used again.

The service contract extends to non-handmade knitted items, too. For example, my dad has a large and well-loved collection of wool socks that sees a lot of use. I've restitched toes, pulled together small holes, and patched large losses in the knitted fabric to keep these favorite socks going for another season or two. In fact, I enjoy the mending process so much that sometimes I "adopt" sweaters from Goodwill and repair tiny moth holes to restore their wearability.

One of my favorite mending techniques is detailed in Kate Gilbert's "Darn It All!" post on the Twist Collective blog. It's option #4, reknit and graft, which creates a new flap of fabric that covers the hole neatly and cleanly. I like to use a contrasting color so that the patch is pleasingly obvious. Somehow, this visible sign of repair feels significant, like the physical manifestation of care, love, and time. For more on these themes, check out Tom of Holland's wonderful blog about his visible mending practice. 

Anyway, my sister-in-law recently gave me her favorite pair of handknit gloves, which had developed rather alarmingly large holes in each thumb. I've worked on these gloves before when they needed a small repair on one of the fingers and I know they were made by someone special and are both used and treasured (the ideal combination for knits) by my sister-in-law. I warned her that the holes may be difficult to repair, but vowed to do my best by them and the original knitter.


These holes were too big to stabilize and close up and I knew that my favored knit patch method wouldn't be appropriate either. It would be awkward to work a patch onto the structure of the thumbs and I worried that the resulting mend would be too bulky. It was time to learn how to darn. Despite all my experience repairing knits, I'd never actually executed a true darn.

I checked out a few tutorials, found a good matching yarn, took a deep breath, and dove in, opting for a slightly larger darned area to give the fabric around the hole greater stability and reinforcement. I'm pretty happy with the results, though next time I'll try for a tidier finish. On the upside, the hole is long gone, the new woven area is dense but still flexible, and any fraying or unraveling that had started with the hole has been stopped. I'd say it's a successful first (and second) darn.


04 June 2017

Exchanges

Thanks to Maine Women Magazine for the fabulous profile of my work! You can read the story in the magazine or online here. It was lovely to share my sweaters and project with their staff and I've had some wonderful interactions as a result of the story. One acquaintance read the story and then gave me her collection of vintage knitting patterns. I was delighted to "adopt" them from her and I think she was glad to know that they were going to a good home.

Along those same lines, I recently participated in an "Emotional Value Auction" at work. The premise was to offer participants an opportunity to release an object and tell its story. These became the items up for bids. Bidders were invited to attend the auction to read about the items on offer and then bid on anything they liked by contributing a story of their own. Owners then chose the story they liked the best and passed the object on to a new person. Many of the items offered in the auction were objects of great sentimental value that no longer fit into the owner's life, but somehow taking them to Goodwill or otherwise disposing of them didn't seem appropriate. Everyone has stuff like that in their life, right? The collected objects ran the gamut from handmade goods to seemingly mundane household items to works of sculpture, while the stories were equal parts humorous and heartbreaking. Bidders' stories were similarly rich and the transactions forged and connections made were powerful. It was a really wonderful event.


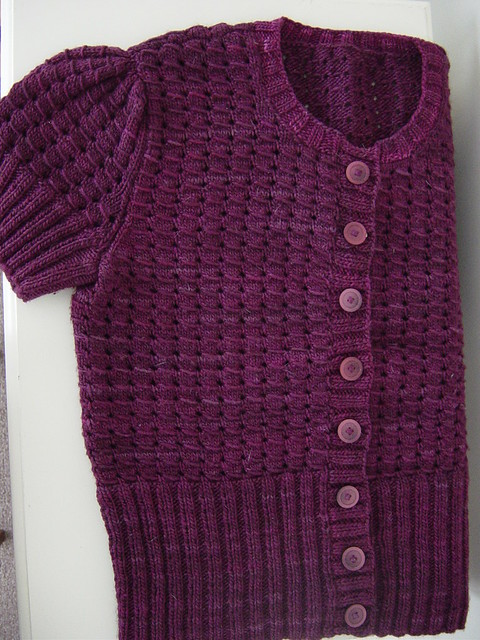
I donated a sweater I'd made years ago. It's a vintage-inspired cardigan that I made in a luxurious silk and wool blend, purchased with the help of a gift certificate to a local yarn store. It was a splurge and a delight to knit. The stitch pattern was fun and the whole project just seemed to fly off the needles. I took extra care in all the finishing and was really pleased with the results. I even liked the fit the first couple times I wore it, but, after that, it didn't seem so great. I felt like it was a little too baggy in the body, so I knit a belt to try to cinch it in. That worked okay, but then I noticed that the shoulders were too wide for me and the puffed sleeves didn't work right. Every time I put it on after that, I ended up changing before I left the house. I considered taking it apart and re-engineering it to fit, but never felt inspired to take real action. So, the sweater sat. I felt sad that I didn't enjoy wearing it, so it seemed like the perfect object for the auction.

Bidding was open for four hours, but no one seemed interested until the very end when I received one bid from a woman who said she loved the design and color of the cardigan and had just moved to the area and needed to expand her sweater collection. I invited her to try it on. Lo and behold, we had a perfect match. It fit her beautifully and even coordinated with her outfit and jewelry! It was a happy exchange. And now I have space for one more sweater in my closet!

24 April 2017

Name, Please!

I've made a good start on my "Name, Please." The deep moss-stitch welt, which looks so good in the pictures, is kind of a pain to knit in fingering weight yarn. It's incredibly time consuming. But, I've moved past that section now and am a few inches above the armhole decreases. A few more inches to go and I'll have finished the back. It's not very picturesque yet, as you can see.


The pattern is written for a vintage size 16 (34" bust), but offers options for size 12, 14, 18, and 20, which is an unusually wide range for a vintage pattern. My gauge with the Jagger Spun sock yarn and size 2 needles was just a touch chunkier than recommended in the pattern, so I got out pencil and paper and did a little math. It looks like my gauge combined with the original size 16 stitch numbers will produce a garment that should fit me. Normally, I'd knit a size 18 for a 36" bust.

Speaking of math, there are some oddities in this particular pattern. The numbers given almost seem more like estimates rather than exact figures, so I've had to be careful and have worked to chart out my course more specifically to make sure I'm working to the right measurements. There's also a vagueness to some of the instructions. For example, the pattern says to increase one stitch at each side every inch until you reach the desired length. This might have been problematic since I've opted to add a few more inches to the body of the sweater. If I had kept increasing as instructed, I would have ended up with too many stitches at the bust. So, I'm going cautiously and will plan to block the back and measure in detail before I tackle the front. That way, I can attempt to correct any sizing issues before the pieces are finished.

Meanwhile, I've been interviewed and my sweaters photographed for an upcoming issue of Maine Women Magazine!